The Top DIY Techniques for Creating Custom Distressed Denim
Discover the best DIY techniques for creating custom distressed denim at home! This comprehensive guide covers everything from basic sanding and fraying to advanced methods like bleach washing and razor distressing. Learn how to achieve professionallooking ripped jeans, vintage fades, and unique tear patterns using simple tools like sandpaper, scissors, and tweezers. We’ll also share expert tips on balancing wearandtear effects, preserving fabric integrity, and styling your distressed denim for a trendy, personalized look. Whether you're a beginner or a seasoned DIY enthusiast, these stepbystep tutorials will help you transform old jeans into fashionable statement pieces. Save money and unleash your creativity with these easy, budgetfriendly denim distressing techniques!
The Top DIY Techniques for Creating Custom Distressed Denim
Distressed denim has been a fashion staple for decades, offering a rugged, edgy aesthetic that never goes out of style. Instead of splurging on preripped designer jeans, why not create your own custom distressed denim at home? With a few simple tools and techniques, you can achieve a personalized, highend look without breaking the bank. Here’s a detailed guide to the best DIY methods for distressing denim like a pro.
1. Basic Sanding for Subtle Wear
For a naturally faded look, sandpaper is your goto tool. Start by marking the areas you want to distress—typically the thighs, knees, and pockets. Use coarsegrit sandpaper (80120 grit) to rub the fabric in circular motions until the top layer of dye fades. For deeper wear, fold the sandpaper and target seams or edges. Always sand gently to avoid overthinning the fabric.
Pro Tip: For a gradient effect, blend the sanded areas with a finer grit (220+).
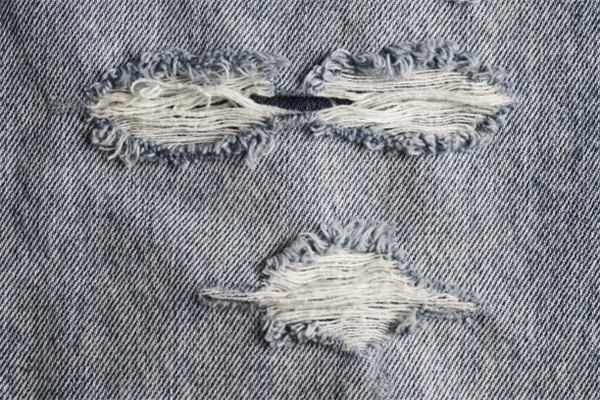
2. Scissor Cutting for Controlled Rips
Precision is key when cutting denim. Use sharp fabric scissors to make small horizontal slits where you want rips. For a frayed finish, gently pull apart the threads with tweezers or a seam ripper. To prevent excessive unraveling, stop cutting 12mm from the edges or reinforce the back with ironon patches.
Best For: Knee rips, thigh slits, or hem distressing.
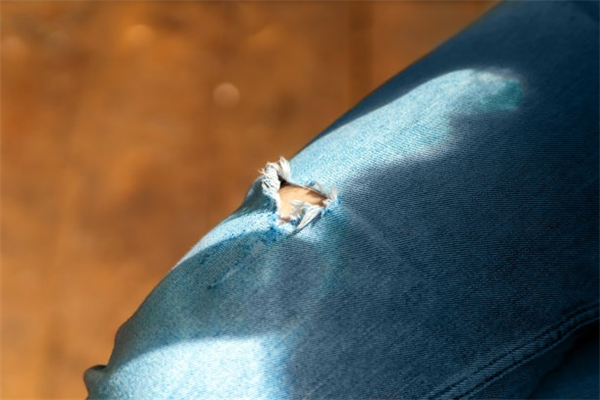
3. Razor Blade Distressing
A razor blade offers more control than scissors for creating fine cuts and shreds. Lightly scrape the blade vertically or diagonally across the fabric to create thin, wispy frays. For bolder rips, layer multiple shallow cuts and stretch the denim to separate the threads.
Caution: Work on a flat, protected surface to avoid accidental cuts.
4. Bleach Washing for Vintage Fades
Bleach transforms dark denim into a sunbleached, vintageinspired hue. Mix one part bleach with two parts water, then soak the jeans (or specific sections) for 515 minutes. Rinse thoroughly and wash separately to stop the bleaching process.
Variation: Use a spray bottle for ombre or splatter effects.
5. Cheese Grater Technique
An unconventional but effective tool, a cheese grater creates microfrays and textured wear. Rub the denim against the grater’s rough edges, focusing on highfriction areas like pockets and seams.
6. Freezer Method for Instant Distressing
For a nocut approach, soak the jeans in water, freeze them overnight, then sand the stiffened fabric. The fibers weaken, making distressing easier.
7. Dremel Tool for Precision
A rotary tool with a sanding attachment speeds up the process, especially for large areas. Use low speed to avoid damaging the fabric.
8. Embellishments: Studs & Patches
Enhance distressed denim with ironon patches, studs, or embroidery to cover holes or add flair.
Final Tips:
Always prewash denim to soften the fabric.
Test techniques on scrap fabric first.
Pair distressed jeans with minimalist tops to balance the look.
With these DIY techniques, you can turn any pair of jeans into a unique, fashionforward masterpiece. Happy distressing!
Global logistics
It can be shipped worldwide
About the MOQ
Minimum order quantity of 200 pieces
Support 24/7
Call us:(+86)138 0277 1794
Free sample
200 pieces MOQ Free sample
Customized product message