Professional Denim Distressing And Sanding Techniques For Jeans
Learn professional denim distressing and sanding techniques to create custom, vintagestyle jeans. This comprehensive guide covers essential tools, stepbystep methods, and expert tips for achieving authentic wear patterns, frayed edges, and faded effects. Discover how to use sandpaper, razors, pumice stones, and bleach safely to distress denim like a pro. Whether you're a DIY enthusiast or a fashion designer, these techniques will help you transform new jeans into stylish, wornin masterpieces. Perfect for upcycling old denim or adding a rugged, personalized touch to your wardrobe. Follow our detailed instructions to avoid overdistressing and ensure longlasting results. Elevate your denim customization skills today!
Professional Denim Distressing And Sanding Techniques For Jeans
Introduction
Denim distressing is a popular technique used to give jeans a vintage, wornin look. Whether you're a fashion designer, DIY enthusiast, or simply looking to personalize your wardrobe, mastering professional distressing and sanding methods can transform plain denim into stylish, rugged apparel. This guide covers essential tools, stepbystep techniques, and expert tips to achieve authentic distressing effects without damaging the fabric.
Essential Tools for Denim Distressing
Before starting, gather the right tools for effective distressing:
1. Sandpaper (Medium to Coarse Grit) – Ideal for creating faded areas and light abrasions.
2. Razor Blades or Utility Knives – Used for precise cuts and fraying edges.
3. Pumice Stones or Emery Boards – Great for softening fabric and adding subtle wear.
4. Bleach or Hydrogen Peroxide – Helps lighten denim for a sunbleached effect.
5. Tweezers or a Wire Brush – Useful for pulling threads to enhance fraying.
6. Chalk or Fabric Marker – Helps outline distressing areas before cutting or sanding.
StepbyStep Denim Distressing Techniques
1. Planning the Distressing Design
Before making any cuts or sanding, decide where you want distressing effects. Common areas include:
Knees
Thighs
Pockets
Hemlines
Use chalk to mark these spots for precision.
2. Sanding for a Faded Look
Lay the jeans flat on a hard surface.
Rub sandpaper over marked areas in circular motions for a natural fade.
Focus on highwear zones (knees, thighs) for authenticity.
For a softer effect, use a pumice stone instead.
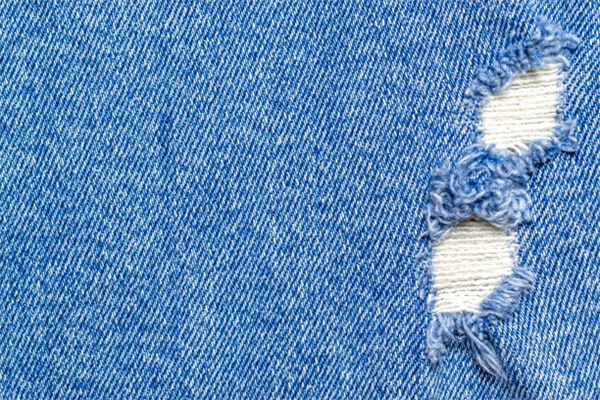
3. Creating Rips and Tears
Use a razor blade to make small horizontal cuts where desired.
Gently pull threads with tweezers to create frayed edges.
Avoid overcutting to prevent excessive damage.
4. Bleaching for a Vintage Wash
Mix bleach with water (1:1 ratio) in a spray bottle.
Lightly spray on areas you want to lighten.
Rinse thoroughly after 510 minutes to stop the bleaching process.
5. Final Touches
Wash the jeans to soften distressed areas.
Trim loose threads for a cleaner look.
Repeat sanding or cutting if deeper distressing is needed.
Advanced Techniques for Professional Results
1. Layered Sanding for Depth
Start with coarse sandpaper for heavy fading.
Switch to fine grit for smoother transitions.
2. Whiskering (Crease Fading)
Focus on inner thigh and hip creases for a natural wornin effect.
Use a sanding block for controlled fading.
3. Edge Fraying
Cut small slits along hemlines or pockets.
Use a wire brush to pull threads for a rugged finish.
Common Mistakes to Avoid
OverDistressing – Too many rips can weaken the fabric.
Uneven Sanding – Work in small sections for consistency.
Harsh Bleaching – Test on a hidden area first to avoid discoloration.
Conclusion
Mastering denim distressing and sanding techniques allows you to create custom, stylish jeans with a vintage appeal. By following these professional methods, you can achieve authentic wear patterns, subtle fading, and rugged textures. Whether upcycling old jeans or personalizing new ones, these tips ensure highquality results. Experiment with different tools and techniques to develop your unique distressing style!
Global logistics
It can be shipped worldwide
About the MOQ
Minimum order quantity of 200 pieces
Support 24/7
Call us:(+86)138 0277 1794
Free sample
200 pieces MOQ Free sample
Customized product message